Table of Content
The Bitnami WordPress Docker image provides the latest version of WordPress, including recent updates. This image deploys two containers, one for the database and another for the application itself. Click the “Install” button to finish the installation. If Windows should ask you about permitting changes to your PC, click “Yes” to allow it to make the necessary changes. Accept all default options and click the “Next” button.
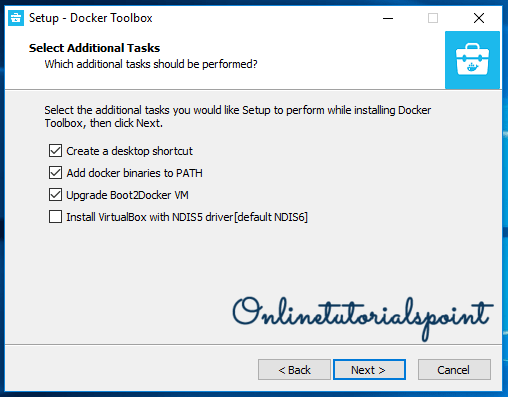
Uninstall Oracle VirtualBox, which is installed as a part of the Toolbox install. Click OK to add the new folder to the Shared Folders list. Choose Auto-mount if you want the folder to automatically be mounted into the VM, and choose Make Permanent for it to be considered a permanently shared folder. The Docker Engine CLI client contacted the Docker Engine daemon. This message shows that your installation appears to be working correctly.
Linux Directory Structure
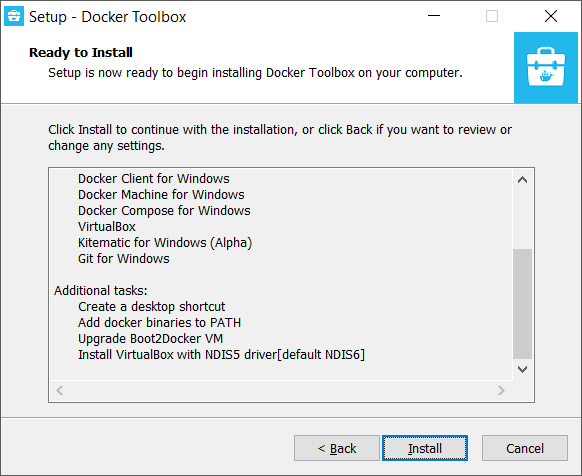
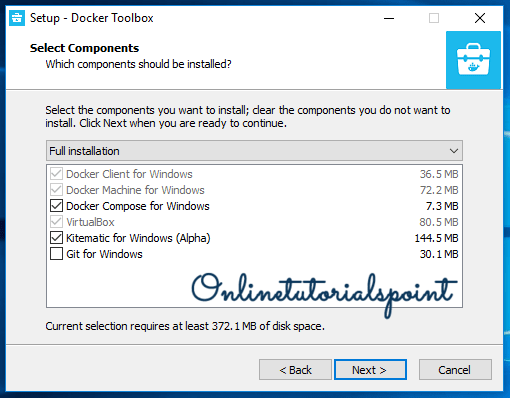
Windows Home or Education editions will only allow you to run Linux containers. Docker only supports Docker Desktop on Windows for those versions of Windows 10 that are still within Microsoft’s servicing timeline. Upon successful installation, you could see the following three icons on your Windows desktop. Review the selected components and click on the Install button. Download the latest Docker toolbox from the official website.
Enabling hardware-assisted virtualization is mandatory for installing Docker Toolbox. The first step is to check if your system configuration meets the requirements needed for running the installer successfully. You’ll need to log out and then log in for the last command to take effect. After that, you can run any Docker command without issue.
Install Windows Subsystem for Linux (WSL)
Docker for Windows now requires Microsoft’s Hyper-V. Once enabled, VirtualBox will no longer be able to run virtual machines . You can still use docker-machine to manage remote hosts. If your system only supports one of the two options, you will not be able to select which backend to use. Follow the instructions on the installation wizard to authorize the installer and proceed with the install. In general, getting "into" the default, Ubuntu instance within WSL is as easy as typing either "bash" or "ubuntu" from a regular CLI prompt. Though, I'd highly recommend installing "Windows Terminal" and using that instead.
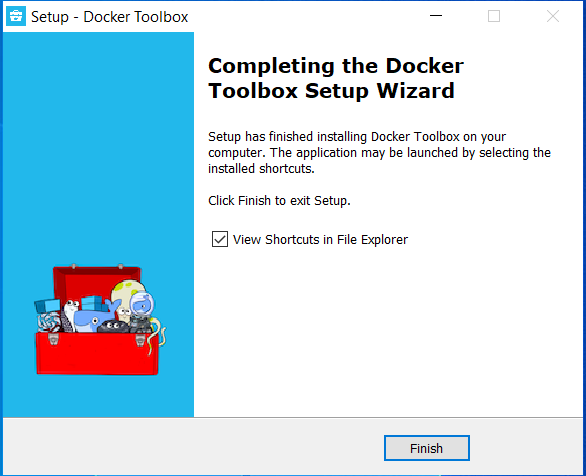
Get the URL of the remote Docker host by typing the following command. If the machine is stopped, run docker-machine.exe start. When the installation is successful, click Close to complete the installation process. If your admin account is different to your user account, you must add the user to the docker-users group. A simpler solution is to switch to Linux for development. You can create a partition and set up dual booting.
Configure Windows 10 Home
Follow the Microsoft documentation to install WSL. Follow the steps in the Docker documentation to install Docker Toolbox. The first place to start is the official Docker website from where we can download Docker Desktop. Windows 10, version 2004 is now GA so I thought I would add to this. The above still holds true, but here are some new resources...
Each Docker Toolbox contains several programs to be able to use Docker. This program based on packages of different programs or processes has become something important for many people. Launch the Docker Quickstart Terminal by clicking the corresponding icon. This starts the creation of the Docker machine and all its components.
Interactions with the Windows host
A bit background on why installing Docker on Windows Home is different than installing it anywhere else. Windows Home edition doesn’t ship with Hyper-V feature which is required by Docker to run containers. Hyper-V is different than hardware virtualization which facilitates running virtual machines through tools like Oracle VirtualBox.

You can check if your system supports this technology in two different ways. # Allow your user to access the Docker CLI without needing root access. First, allow me to explain how the Docker installation will work on Windows.
Commercial support is available at nginx.com. Double-click InstallDocker.msi to run the installer. Docker for Windows runs on 64-bit Windows 10 Pro, Enterprise, and Education; 1511 November update, Build or later. Docker plans to support more versions of Windows 10 in the future.
For more information, see Running Docker Desktop in a VM or VDI environment. BIOS-level hardware virtualization support must be enabled in the BIOS settings. Then you will be prompted to provide the installation directory. If you would like to give another location, you can click on the Browse button.
All Rights Reserved.
Since the Docker Engine daemon utilizes Linux-explicit portion highlights, you can’t run Docker Engine locally on Windows. Rather, you should utilize the Docker Machine order, docker-machine, to make and join a little Linux VM on your machine. This VM has Docker Engine for you on your Windows framework. 99.999% of the time, you just need a Linux Container, since it bolsters programming assembled utilizing open-source and .NET innovations. Likewise, Linux Containers can run on any distro and prominent CPU structures, including x86_64, ARM and IBM.
Choose the local folder for Docker Toolbox installation. Look “System type” to check if you are running a 32-bit or 64-bit version of Windows. You’ll need to restart your machine for this setting to take effect. This will be our primary terminal for running Docker commands. If you’ve ever tried to install Docker for Windows, you’ve probably came to realize that the installer won’t run on Windows 10 Home. Only Windows Pro, Enterprise or Education support Docker.
Consult your local security expert or read the documentation if you’re nervous. To avoid the loss of precious fluids, you can either upgrade your Windows 10 version or follow my recipe below. You cannot install Docker for Windows on Windows 10 Home according to the documentation. However, you always have the option to download Docker Toolbox from your computer to be able to run it with all its components.


No comments:
Post a Comment